Thursday, January 26, 2012

SUPER FAST BEACH WAVEY HAIR!!!

I have said before...I'm always busy!  I don't usually have time to sit and curl my whole head of hair!  For Christmas I got this crazy lookin "deep wave iron"  I wasn't sure what the heck it would do but I finally tried it and wow...so easy!
I sectioned my hair in 4 sections...parted down the middle and then lifted half up and kept half down.  I used the iron on the four sections and total time it took was about 3 minutes!  I got a full head of waves and no 80's crimping look either!  I would highly recommend this HOT TOOLS DEEP WAVE IRON for fast beach waves! 


Heres me on my third section...

All done...so quick.


Here is my hair all done...
Then I kinda shook my head out and got a messy look....
Trying to get a back and side view...check out the wave...isn't it so cool looking!


FRAMED CANVAS WITH PHOTO COLLAGE

Today I made amazingly easy photo collages. 
I started with some canvas that I had painted before...I painted the same color as my wall right onto the canvas over my previous design. 
Then I spray painted some old banged up frames I got at Hobby Lobby...each was on clearance for $4.00
I distressed the frames by sanding some of the white spray paint off.
I had photos printed at Walgreens with a studio border called Black Torn.

After nailing the frames to the canvas, you are ready to work on your pictures.  You can also use a canvas that fits into a frame but I like how it looks to do a frame a little smaller than the canvas.


The next step is to use spray adhesive to mount your pictures to black foam (Hobby Lobby). 

After the pictures are mounted do a coat of Mod Podge MATTE, I like the brand shown in the picture (Hobby Lobby).

Cut out all the pictures that are dried and stuck to the foam.  Arrange the pictures how you wish on the canvas.  I used GLASS tile to write on and clue to foam to add more than just pictures to it.  I also printed a big black E to add.  I used the Mod Podge to add the paper E.
To add the pictures and the tiles I used a hot glue gun and just stayed clear of the edges. 
HERE IS THE END RESULT:


Wednesday, January 25, 2012

ORGANIZING MY CLOSET!

I am fortunate enough to have a BIG walk in closet.  Of course no closet is ever big enough so I am always looking for ways to make organize my little retreat. 
I use to have my shoes thrown up on a wire shelve...I found myself forgetting I had those old pair of black heels I use to love...
SO, I decide to spend the dang $12.00 on 10 bins (at Target) and organize my shoes giving all of them a fair shot at getting out and about...
I didn't get larger bins for boots yet but I think I will do that next....
I took pics with my phone and sent straight to the printer.  I printed wallet size pics of each pair so NOW I will see all that I own. 


Monday, January 23, 2012

HALLOWEEN..it's my FAVORITE HOLIDAY!

Every year I get the same requests from my husband when it comes to our Halloween costumes. 
#1  No crazy make up
#2  No big wigs
#3 Nothing glued to the face
and #4  Nothing too uncomfortable!

With those things in mind I began my search.  I happen to stumble upon these amazing costumes on buycostumes.com

All the costume consists of is fabric that is a magazine cover, wrapped in pvc and then tied around you.  It's not the easiest to drink with but was so easy to wear and we got SO MANY compliments. 
NOT TO MENTION I only paid $20 for each!


The guy on my husband's magazine cover was SO tan, I had to put bronzer all over his face!  I guess that's his tough guy face he is making??!!

FRAMED SILHOUETTES

I LOVE these....simply have your child turn for a profile picture shot.  Print the picture to the size you want your silhouette to be.  Printing on card stock will make it easier to trace.  I then traced it onto black paper and framed with scrapbook paper behind it.  AND YES, my oldest son has a mo-hawk.  He loves that you can see it in this pic!


I LOVE TATTOOS!

Just wanted to share my tattoos with you....the top is my latest...I LOVE IT!
Then the middle is a mistake tattoo that I used to cover up a stupid little cartoon moon I got one stupid night in college.  Then tried to do matching crosses on my feet but the foot one hurt so bad I ended up only doing one.  And last is my little crazy boys names on my wrists!


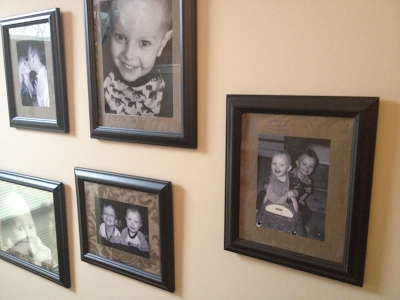
FABRIC MATTED PICTURES

The cost of photo matting can be very high...I decided to get a yard of fabric and use that instead.  All you have to do is cut the fabric 1 inch larger than your frame on all sides and use a glue gun to glue the fabric to the back of the frame holding....

Here's what mine looked like once done...

AMAZING WALL DECALS

So when we moved into our house I was clueless what to do with all the empty walls.  I stumbled across a website with really cool wall decals.  THEN I saw on the website they did custom designs SERIOUSLY well priced!  I immediately ordered my first decal.  After getting it like 3 days later (SUPER FAST SHIPPING) I was hooked!
I ordered another decal and then another, and so forth. 
My husbands dad who is now confined to a wheel chair from MS, use to read him The Giving Tree every night.  In honor of him we had Mindy over at highstylewalldecals.com make us a LARGE Giving Tree decal that we hung in our 2 story entry.  All we did was send her a picture and the dimensions of our nook we wanted to put it in.  It came out perfect and he cried when he saw it...

THIS IS BY FAR THE BEST WEBSITE OUT THERE FOR WALL DECALS!!! 
AGAIN...highstylewalldecals.com 
MINDY IS AWESOME!
Here are the pics of the ones we did....


KIDS DIY BIRTHDAY PARTY

My son Mason wanted a Phineas and Ferb birthday party....if it was last summer it wouldn't have been hard to find TONS of decorations for it at the store...the problem was it was literally MONTHS after the show premiered which meant NO STORE BOUGHT DECORATIONS!!!

I came up with ways to make our own favors and decorations for a BACKYARD PHINEAS AND FERB BEACH PARTY...


For cut outs I simply used an old refrigerator box and painted them on and cut it all out.  I was shocked how easy it was to draw them and paint them...Took some time but was well worth it. 
We also painted and cut out a surf board and set up a cute photo-opp for kids to take pics with.

For party favors one of the things we did was wrap mini chocolate bars with Phineas and Ferb images I found online and printed out.  We also did the same thing for granola bars. 

The kids all LOVED the party!

5 SECOND CUTE WALL IDEA

Another lovely idea I saw on Pinterest...IKEA sells this white frame for $4.99.  Take off the back and put up on wall around thermostat....such a cute way to spruce it up....

PAINTED ON WALL PAPER LOOK

So my laundry room so super boring...I need a way to spice it up.  I LOVE the look of wallpaper but after spending countless hours taking it down on my old house, I swore I would NEVER put any up again.  I found a pattern with a printable stencil on Pintrest and gave it a try....
I LOVE my new wall and now LOVE my laundry room too. 


I THEN decided I loved the Laundry room so much that I decided to do my bedroom.  I wanted a very "barely there" look so I took the SAME paint color as my wall and added a little white to it.  I mixed and added slowly until I got the desired color.  I love that it's a very light pattern but still makes such a statement. 

PAINTING AND RE-INVENTING FURNITURE

So I bought new chairs for my breakfast area and then realized the chair legs have BROWN wood and I had a BLACK table....
I planned to buy a new table but couldn't seem to find one anywhere that I liked...SO, here's what I did. 
Step 1...Sand the table top down...I used 150 sandpaper.
Step 2...Use DARK brown HI-GLOSS paint and do a little section at a time...paint on a streak of paint and spread and wipe with paper towel.
Step 3....Do the whole table top till it looks like marble. 
Step 4...Apply a thin even layer of Poly, let dry. 
Step 5...Sand lightly with a 200 sandpaper...
Step 6...Apply another thin layer of Poly and then the top is done.
Step 7...I sanded a little on the edge lip to give a distressed look.


THEN I decided to tile the sides to match my new chairs...

Step 1....Get small tiles and measure out to make sure you will have no cutting (unless you know how to cut tile, which I don't).
Step 2...use tile adhesive to glue up tile...don't use too much and spread across the tile backing thinly.  You may have to wipe extra glue off the front of the tiles if you use too much.  Let DRY!
Step 3....I used already mixed grout...grout in between any spaces and clean fronts.. LET DRY AGAIN!Step 4...Wipe clean any dry grout that is on the front of the tiles.  I did NOT seal my tile grout because it is not being touched or getting wet. 

I distressed the bottom of the table as well...


Final table looks SO much better with my chairs!!  Mission accomplished, and all for under $20
Home Depot...tile sheets about $5.00-two sheets
Hi-Gloss paint (I had from previous projects)
Premixed Grout-$8.00 at Home Depot and Small can of Poly at home depot $5.00

NO HEAT HEADBAND CURLS!

So recently I discovered Pinterest...I AM OBSESSED!!!  I find so many great ideas on there.  I do my best to try at least 1 new idea from it each day.  Last night I tried the NO HEAT headband curling technique....

Here's how it turned out...This is so easy.  Simply take a stretchy headband and place OVER your hair, like you would see in the 60's.  Spritz your hair with some water, getting it damp but not soaked.  Then, grab sections of hair starting in the front and twist over the headband over and over till it's all wrapped around.  GO TO BED and that's it.  It will be messy in the morning but don't worry, once the headband comes out you end up with beautiful lasting curls that you did the night before in 5 MINUTES!!
Continue to do section by section till your whole head is wrapped around the headband. 

Sunday, January 22, 2012

MY HOUSE...MY STYLE

This is a before (duirng building) and after of our front view into our home going into our living room.    This WHOLE house was done on a TIGHT budget and you will never believe the deals I found...


This is a before (during the building process) and after shot of our stairs going up and the front entry. 

Pillars that were a MUST for my front entry. 

So basically my husband and I saved and saved until it was possible to knock down our old house and build ourselves this lovely beauty.
NEVER in a million years did I realize the amount of work and decisions that go with building a house from scratch but also the amount of freedom to choose everything just how you like it. 
Luckily I was able to help monitor and do most of the fixtures shopping on my own which saved us TONS of money.
I cant express enough how many decisions that go into a house design.  If you are planning on building remember to BREATH..it will all work out, it just takes LOTS of work, research, shopping and TIME!


ME...Hi my name is Kate....

Hello all...I am new to the blogging world but after being told my numerous people to start a website with all my crazy life ideas/tips...I decided to give it a try.
 
I am a 31 year old SAHM with 2 little boys that keep me on my toes at all times of the day and night.  My husband is a CPA which means from January to April every year he is gone working his butt off.

In those months especially I take the time to really get INDOOR projects done on my house (which we built 3 years ago). 
The rest of the year I love to be OUTSIDE working in the garden or just working on ANYTHING outside!  I LIVE to find bargains any way possible....there is nothing in this world that you shouldn't at least try to find at a discounted rate!

From reinventing furniture to DIY craft ideas to baking crazy cupcakes or cookies, this blog covers everything I love to do!!!  ENJOY and I hope I can inspire you to give something a try you wouldn't normally do....If you don't challenge yourself you will not grow!